How to Create and Print the Perfect Barcode Label: Best Practices
You already know that implementing a barcode system can drastically improve your business’s efficiency and accuracy. However, a barcode is only useful if a scanner can actually read it. A poorly printed, incorrectly sized, or smudged Barcode Label will cause bottlenecks at checkout, delayed shipments, and frustrated employees.
To ensure your inventory management runs smoothly, you need to understand the mechanics of generating and printing high-quality labels. Here is your step-by-step guide to creating the perfect barcode label for your products.
Step 1: Choose the Right Barcode Format (Symbology)
Before you generate a barcode, you must choose the correct “language” or symbology. Different industries use different formats:
-
1D Barcodes (Linear): These are the traditional vertical lines.
-
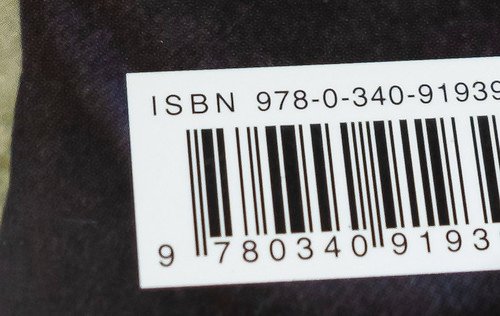
UPC/EAN: Mandatory for retail products sold globally.
-
Code 128 & Code 39: Excellent for internal inventory, asset tracking, and logistics due to their ability to encode alphanumeric characters.
-
-
2D Barcodes: These look like squares of pixels and can hold significantly more data, including website URLs, contact info, or detailed product specs.
-
QR Codes: Perfect for marketing, user manuals, and consumer engagement.
-
Data Matrix: Often used in electronics and healthcare for tracking tiny items.
-
Step 2: Ensure High-Resolution Generation
Never use a blurry screenshot or a low-quality image of a barcode. When creating your design, use a dedicated barcode generator that outputs files in high-resolution vector formats (like SVG or EPS) or high-quality PNGs. A crisp, sharp edge is critical for optical scanners to interpret the data correctly.
Step 3: Master the Design and Layout Rules
Designing a scannable label requires strict adherence to a few visual rules:
-
High Contrast is Key: Always print dark bars on a light background. Black ink on a white label is the gold standard. Avoid using red ink for the barcode lines, as most laser scanners use red light and will not be able to “see” the red bars.
-
Maintain the “Quiet Zone”: The quiet zone is the blank space immediately to the left and right of the barcode. This blank margin signals to the scanner where the barcode begins and ends. If text or graphics bleed into this zone, the scan will fail.
-
Proper Sizing: Do not stretch or shrink a barcode disproportionately. If you need to fit a barcode into a tight space, it is better to reduce its height (truncation) rather than altering the width of the bars, though this should still be done cautiously.
Step 4: Select the Appropriate Hardware
Your printing method dictates the longevity of your labels.
-
Standard Office Printers (Inkjet/Laser): Good for printing sheets of labels for temporary, indoor use. However, inkjet ink can smear if it gets wet, making it unsuitable for harsh environments.
-
Thermal Printers: As the industry standard for commercial operations, thermal printers produce highly durable labels that resist fading, smudging, and water damage.
Step 5: Test Before You Deploy
Before printing 10,000 labels, print a small test batch. Test the labels using the exact scanners your staff or customers will use. Scan them from various angles, distances, and under different lighting conditions to ensure 100% reliability.
Streamline Your Barcode Generation
Creating functional, durable, and easily scannable labels doesn’t have to be complicated. By following these best practices, you can eliminate scanning errors and keep your operations moving at top speed.
Whether you need to generate codes for a new retail product or overhaul your warehouse tracking system, having the right tools makes all the difference. Start optimizing your workflow and create the ideal Barcode Label tailored specifically to your business needs today.
© barcodly.com- All rights reserved